All installations should meet local codes and standards and be performed by qualified or experienced personnel.
Installing Batteries

Although the DC system can be ‘low voltage’, significant hazards may be present, particularly from short circuits of the battery system.
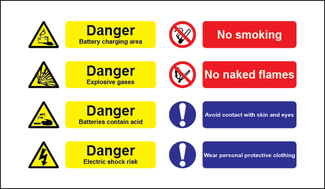
Battery banks can be very hazardous. They store a great deal of energy in a small space, use corrosive chemicals and during charging dangerous quantities of explosive hydrogen may be liberated. There is a real potential for explosion or fire. Beware of the power stored in a battery and avoid accidental shorting across terminals and possibility of explosion or electric shock.
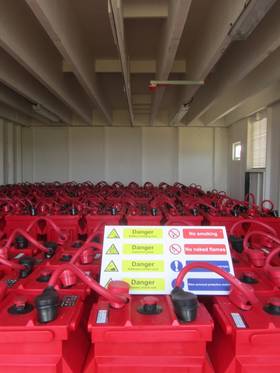
Lead Acid Batteries These should be located in well ventilated rooms or sheds away from living areas and insulated from extreme temperatures. They need to be as close as possible to both PV array or wind generator and loads to reduce voltage drops. They should be installed in boxes or on racks to keep them off the ground and securely protected. Provision should be made to contain any accidental spillage of battery electrolyte.
- All work in the area should only be done using tools with insulated handles to avoid the possibility of accidental short circuits and creating a spark.
- No smoking! It is also good practice to remove metal bracelets, etc. when working in the area.
- Baking soda neutralises lead acid battery electrolyte. Keep a supply on hand in battery areas.
- Wear protective gloves, clothing & goggles and have fresh water nearby in case battery acid contacts skin clothing or eyes.
Lithium-Ion Batteries Lithium Ion batteries can be subject to thermal runaway, which in extreme cases can result in cell rupture, explosion and fire. Lithium Ion battery packs contain control circuitry which protect the battery against these hazards, however care needs to be taken to ensure:
- Manufacturer’s installation guidance is followed
- Control circuits are not damaged or modified
- Battery terminals are not shorted or connected in reverse polarity
- Batteries are only connected to approved charge-discharge units
- Battery cases are not damaged or punctured
- Batteries are not subject to excessive heat or cold


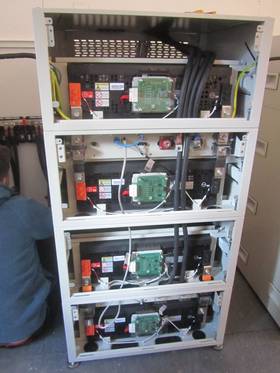
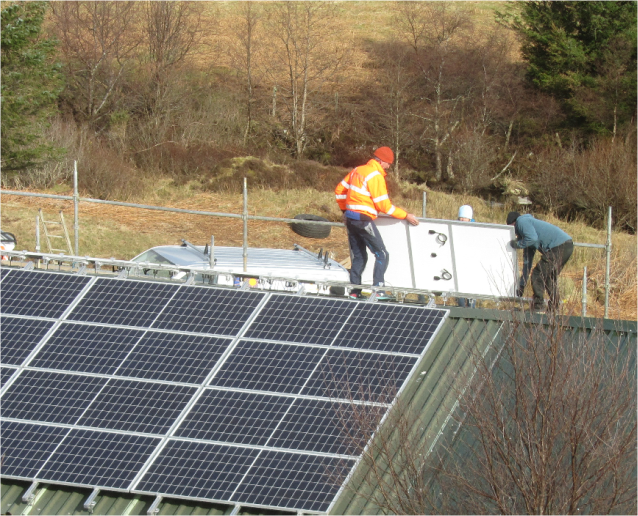
Installing Inverters
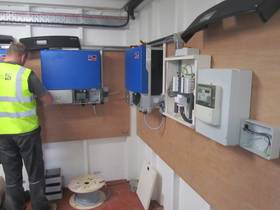
Inverter systems by their nature involve AC power from multiple sources (inverter, generator, utility, batteries, solar arrays, wind turbine) that adds hazards and complexity which can be very challenging.
Battery inverters should be sited as close as possible to the battery to maximise performance and minimise cable size. However, they should not be placed above the battery or in the same compartment as vented lead acid batteries.
Any displays and control panels should be easily accessible.

Grid Connect Installations
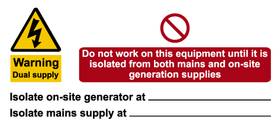
These in particular need to be carried out professionally and present their own issues with connecting to mains electricity and include high voltage DC wiring, with which few electrical installers are familiar.
Installers are obliged to liaise with the relevant Distribution Network Operator (DNO) and the installation and equipment must meet relevant standards.
These should only be installed and serviced by professional, qualified personnel.

Installing PV Solar Systems
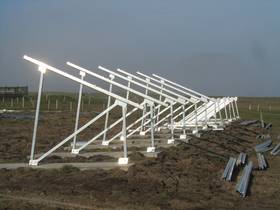

Siting and Mounting:
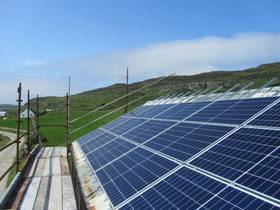
PV modules should be located where they will receive maximum sunlight and not be shaded, overheated or covered in dust. Take account of growing vegetation.
- Use a compass and inclinometer to locate the PV site and set array tilt.
- Secure mounting frames must be used, either fixed or tracking; on roof; wall; pole or ground. Mounts, fixings and roof structures must be able to withstand weathering and strongest expected winds.
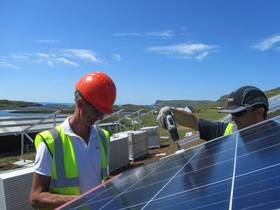
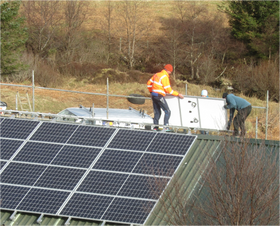
- Care must be taken when handling solar modules to protect the glass and backs of the modules from damage.
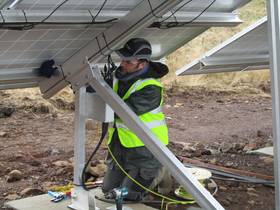
Take care when working on roofs and ladders:
- Use scaffolding under the entire working area.
- Use roof ladders or planks when walking on the roof to spread loads.
- Use a fall arrest system if possible.
- Make provision to enable safe lifting of components & tools to the roof.
- Follow any mount and module instructions and read before installation.
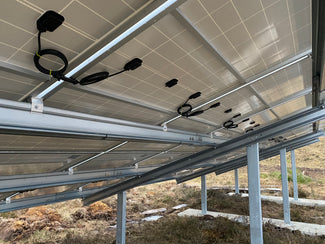
Wiring:
A PV module generates DC electricity when exposed to sunlight, when modules are connected in series, voltages are additive; in parallel, currents are additive. Consequently, a system assembled from PV modules can produce hazardous DC voltages and currents whether the array is connected or not.
- Ensure modules are wired in a series/parallel configuration that matches system voltage.
- Inter-module connections can be made in module junction boxes or using plug-in connectors.
- For connection to larger output cable or to connect sub-arrays extra junction boxes can be used. These should be wired carefully and well sealed to prevent corrosion.
- Do not touch terminals while module is exposed to light: provide suitable guards to prevent contact with 30 VDC or greater.
- Use only insulated tools.
- When installing or working with modules or wiring cover module face completely with opaque material or make sure to never make ‘live’ connections.
- Module frames should be earthed.


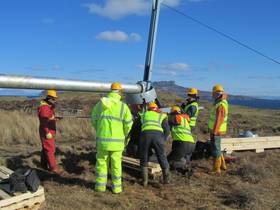
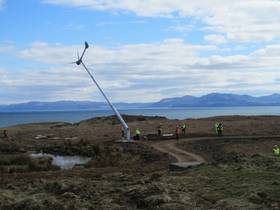
Installing Wind Turbine Systems
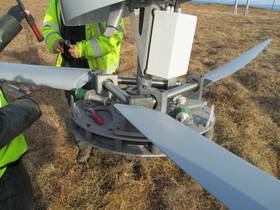
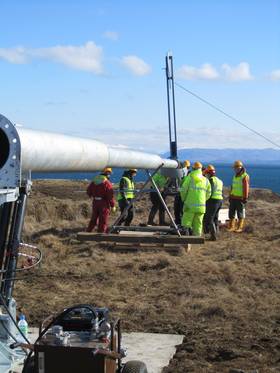
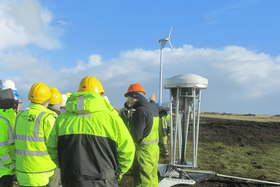
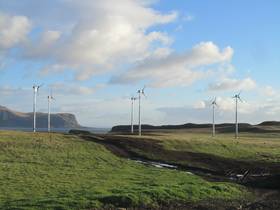
- Wind turbines need to be sited in the best available wind site but as close as possible to battery location.
- The tower needs to be high enough to place the wind turbine above turbulence caused by nearby obstructions.
- For permanent installations concrete foundations are used. These need to be accurately set out along with the tower foundation steelwork. Concrete should be allowed to cure for at least two weeks before the wind turbine is installed.
- It is useful to provide a duct through the tower base pad for easy routing of the wind turbine output cable.
- Mount wind turbines high enough so that tips of rotating blades are well above head height (min 3m from ground).
- Prevent unauthorised access to towers.
- Potential high (lethal) voltages can be produced by wind turbines when ' open circuited' ie. disconnected from the battery, and spinning. Use extreme caution when opening control boxes etc. and disconnect power before working on electrical components.
- When raising or lowering towers, keep all spectators out of the way, make sure all supporting guys etc are not snagged. Ensure all people involved understand what is happening (and are wearing safety helmets), ideally use a winch and gin pole method. When raising a tower for the first time, do it first without the wind turbine fixed.
- Never climb towers or work on electrical circuits when the turbine is turning, during strong winds, or in electrical storms.
- When climbing a tower wear a safety belt and hard hat at all times.
- Dress warmly, comfortably in clothing that will not catch on steelwork, wear non-slip shoes and avoid haste!
- Always have someone else on the ground to help in case of trouble.
- Beware of falling tools or components, use pouches or belts, and pulleys/ropes to raise/lower parts etc. Wear hard hats when someone is working above you.
- Make sure the turbine is restrained from turning until the rest of the installation is complete.
- Make sure that regular maintenance of the turbine and pole or tower is carried out to avoid possibility of problems or catastrophic failure occurring.
Due to the skills involved, anything other than very small wind turbines should only be installed and serviced by qualified personnel.


DIY Installation of Small DC Systems
If basic procedures are followed very successful small scale wind & solar systems can be self installed. Indeed, sometimes in remote areas there may be no choice! Often DIY installation can reduce costs and can also mean users understand their systems better, so gaining most benefit from them. However, electricity & wiring may not be for everyone, can be dangerous, and mistakes can be expensive! So, if in doubt and particularly for larger systems, an experienced electrician or installer should supervise or undertake the work.
In all cases systems should be installed according to local electrical and other safety codes.
See Safety
Installation Procedure:
- Check all equipment is on site.
- Lay cables to loads. Attach lamps & sockets.
- Site PV modules, lay cables & install array.
- Site battery & install.
- Site controller, lay cables & install.
- Connect controller to battery
- Connect PV modules to controller
- Complete all cables
- Commission system.
Always study system component installation/operation instructions and follow the recommended sequence of installation. Work carefully - don’t rush those last connections! Use proper tools, correctly sized cables and ensure good connections.
- All circuit wiring should be completed before connection to the battery.
- Whilst wiring check polarity and for short circuits using a multimeter.
- Make sure all loads are switched off or unplugged before making battery connections or switching on inverters.
A common source of problems in a low voltage system can be poor connections. These cause a voltage drop (& power loss) or worse will stop the system working. The following measures help to avoid this:
- Use multi-stranded wire rather than single stranded wherever possible.
- Use correctly sized connector strips for joining cables - never twist wires together to join them.
- Locate all connections so they are accessible - preferably inside junction boxes (sealed if outside).
- Use a crimp tool and connectors for attaching wires to terminals.
- Clip all cables securely and neatly at regular intervals or use supported conduit.
- Use armoured cable for burial underground.
- Use conduit in harsh conditions.
- Use a catenary wire for overhead cables.
- Use a wiring diagram - a copy should be kept near the system control box. This is vital as a reference for electricians working on the system in the future.
Follow established cable colour codes.
In the UK:
DC: positive - brown (formerly red); negative - grey (formerly black). AC: live -brown; neutral - blue (or grey); earth - green/yellow (or black). Three Phase: L1 - brown; L2 - black (or brown); L3 - grey (or brown); Neutral - blue.
In the US:
AC: live (hot)- black; neutral - white; ground - green. Label cables during work.
Always double check polarity when wiring
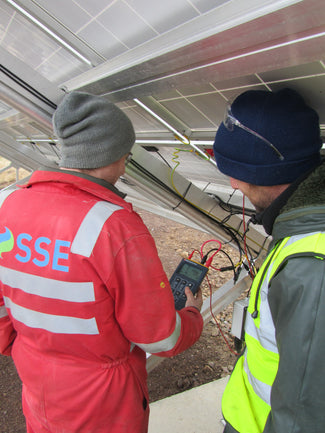
Commissioning:
If in doubt an electrical technician experienced with wind/solar electrical systems should make final tests and connections.
- Follow manufacturers installation and commissioning instructions.
- Choose appropriate weather conditions for commissioning.
- Check battery terminals for polarity and correct voltage.
- Check load wiring for short circuits and continuity.
- Check PV array open circuit voltage, output cable polarity and short circuit current.
- Connect up batteries to charge controllers.
- Check all loads are switched off.
- Connect up loads to battery or load controller.
- Connect up inverter to battery.
- Connect up PV array and wind turbines to respective outputs.
- Install fuses.
- Switch on according to equipment instructions
- Check meters for output.
- Check inverters and loads for operation.
- Smile!
Related Articles
-
-
Troubleshooting Systems
Although the equipment in properly installed systems is unlikely to...
Read more